# SpringBoot实践
# 1 SpringBoot入门
1、SpringBoot简介
- 简化Spring应用开发的一个框架
- 整个Spring技术栈思维一个大整合
- J2EE开发的一站式解决方案
2、微服务 MicroService
- 一个应用是一组小型服务;可以通过HTTP的方式进行交互
- 每一个功能元素最终都是一个可独立替换和独立升级的软件
SpringBoot可以快速构建一个微服务单元
3、环境
- jdk 1.8: SpringBoot推荐1.7以上
- maven3.x maven 3.3以上版本
- IDEA 2017
- SpringBoot 1.5.9.RELEASE
# 2 SpringBoot实践
# 2.1 springboot hello world
1、创建Maven项目
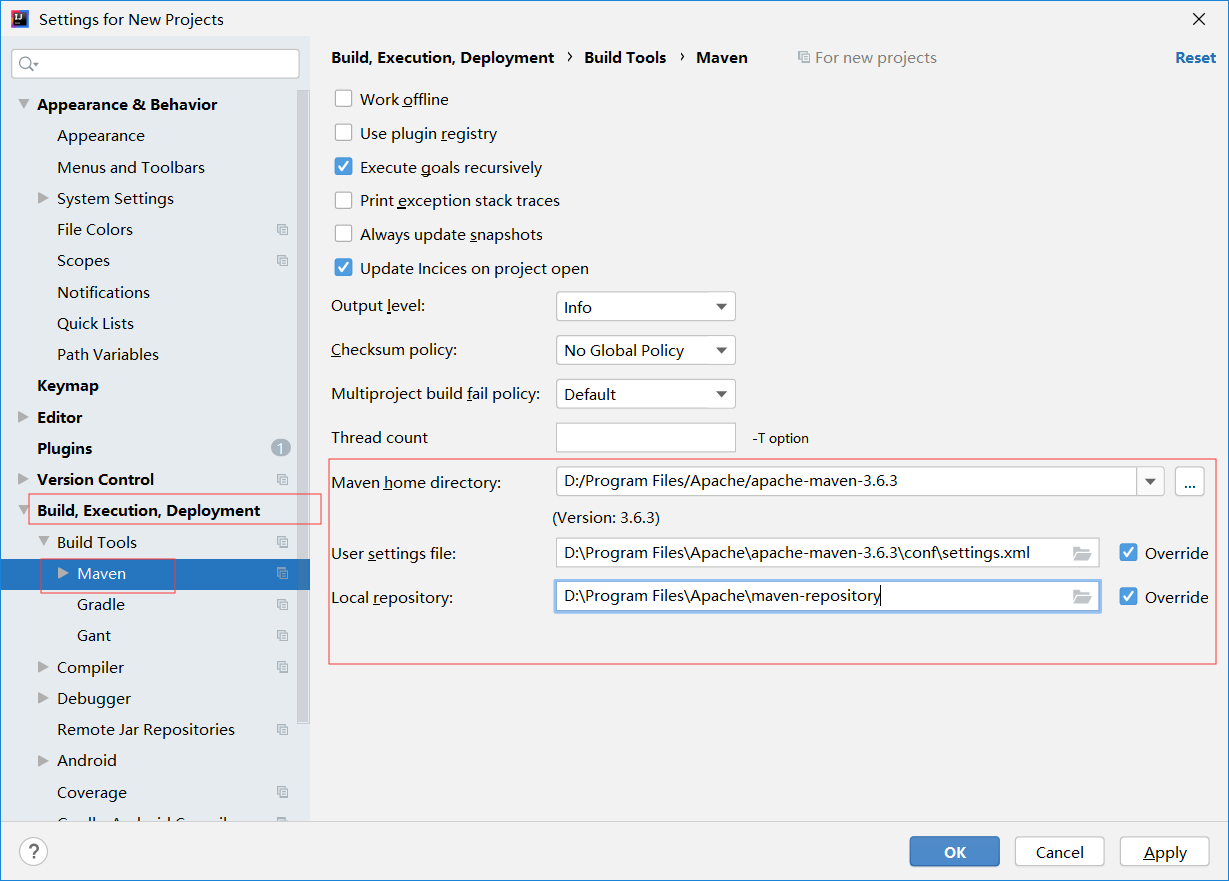
step1 设置maven
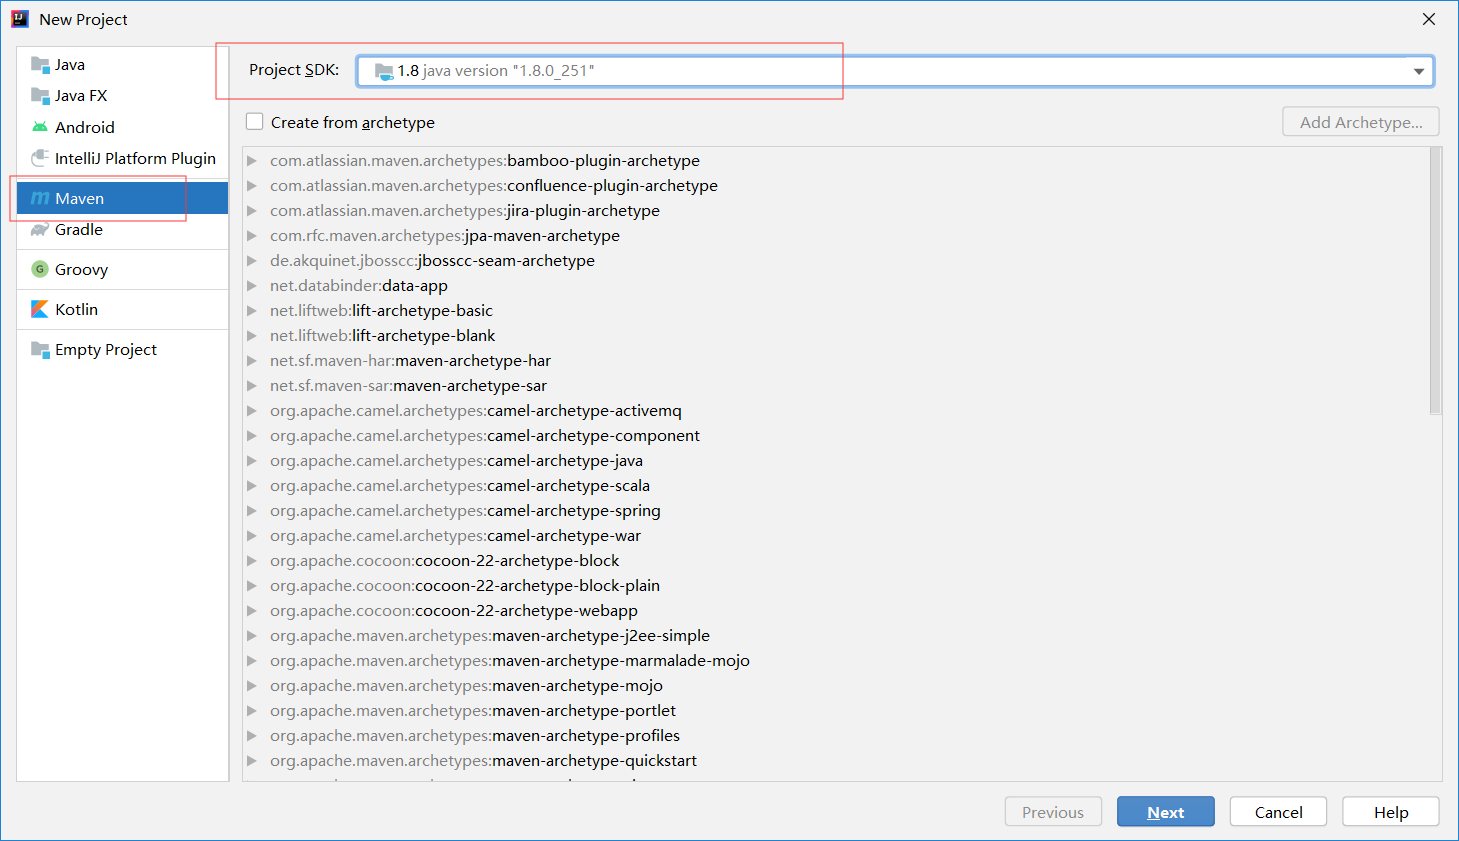
step2 创建项目
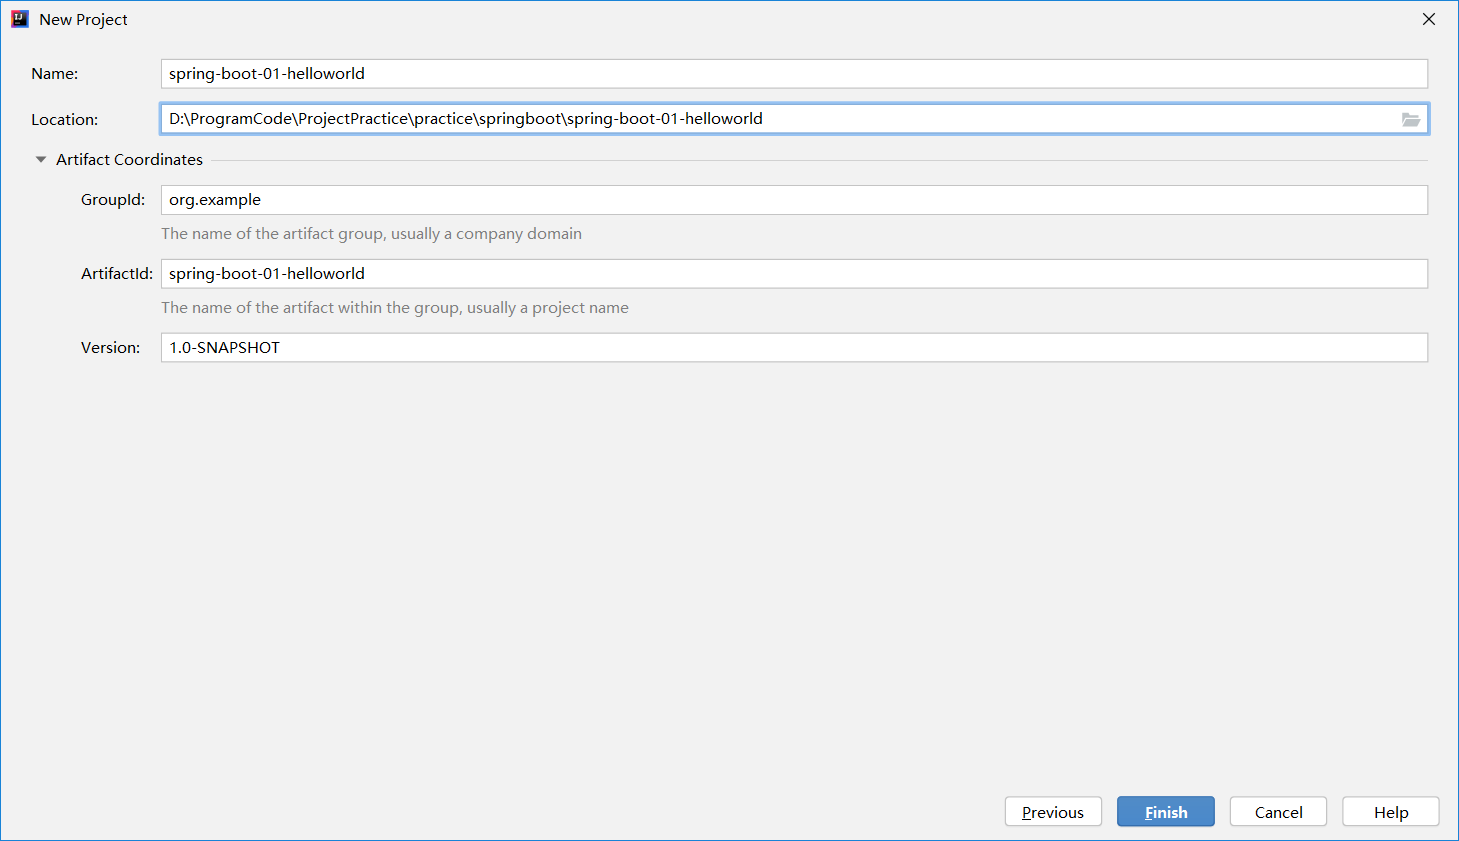
step3 设置项目名称以及路径
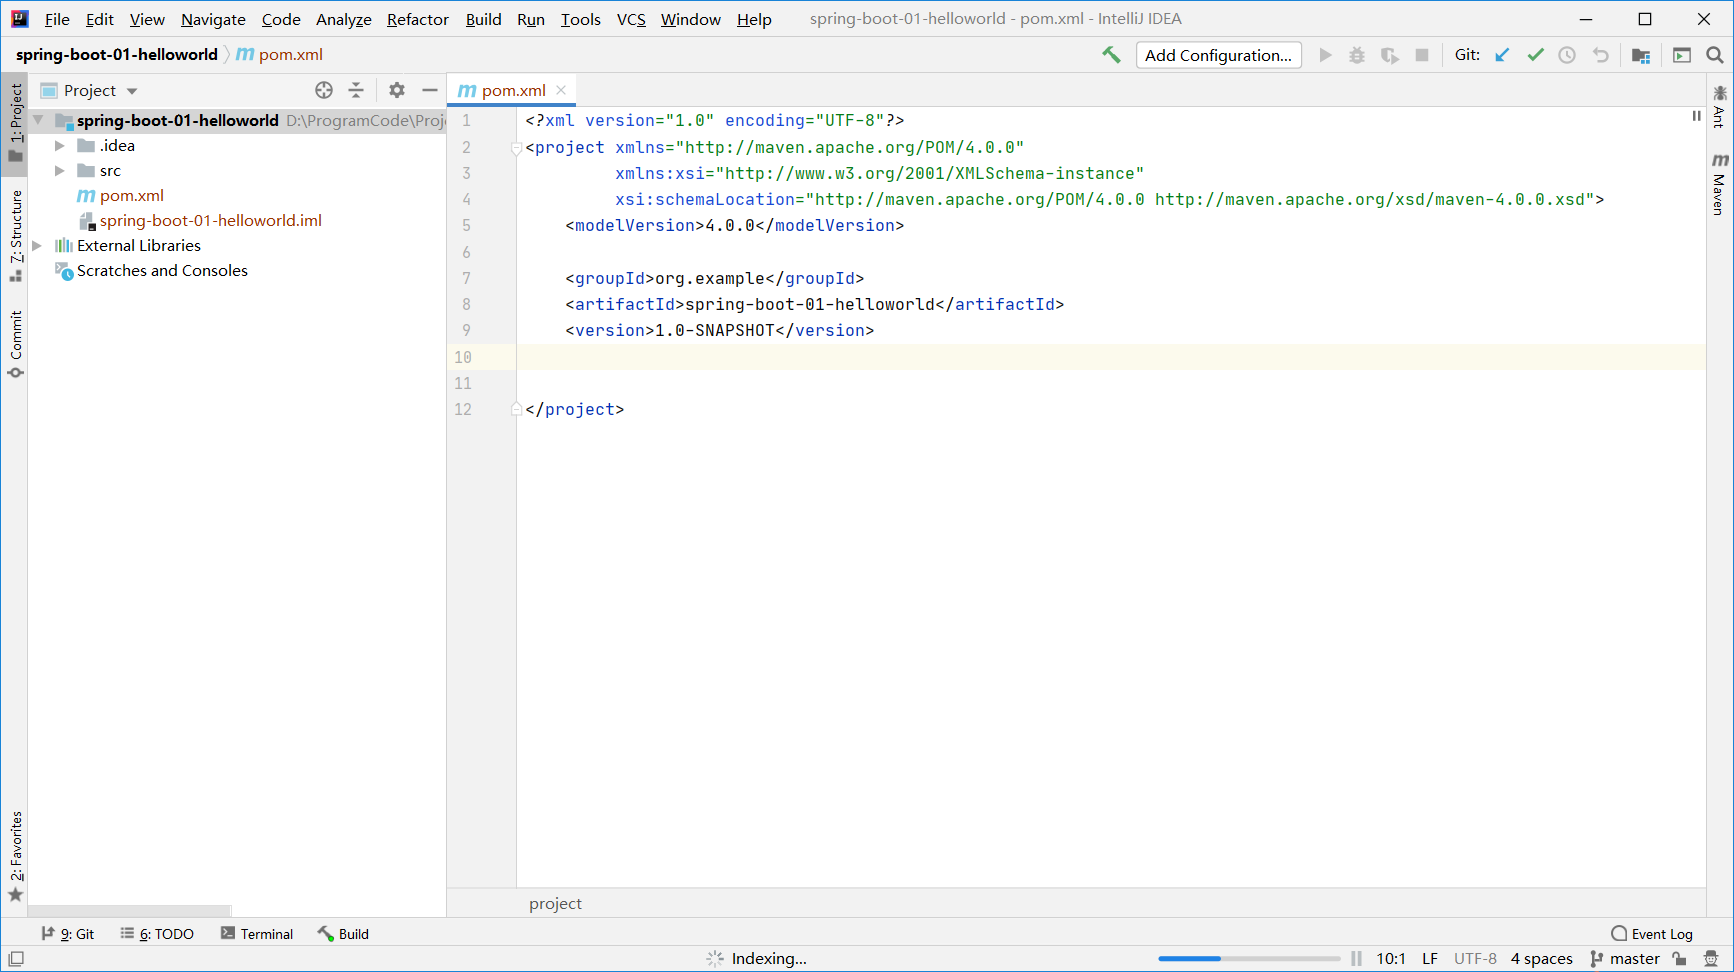
step4 创建成功
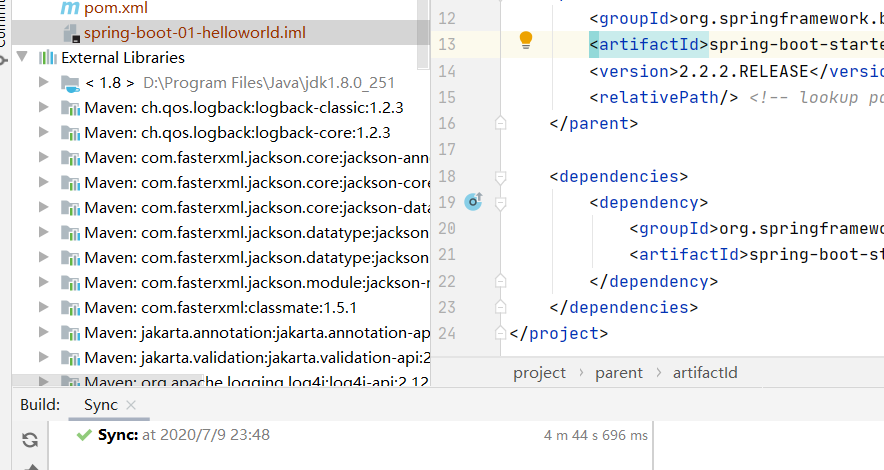
2、导入springboot依赖
SpringBoot官网
https://spring.io/projects/spring-boot#overview
https://spring.io/guides/gs/rest-service/
在pom.xml中添加:
    <parent>
        <groupId>org.springframework.boot</groupId>
        <artifactId>spring-boot-starter-parent</artifactId>
        <version>2.2.2.RELEASE</version>
        <relativePath/> <!-- lookup parent from repository -->
    </parent>

    <dependencies>
        <dependency>
            <groupId>org.springframework.boot</groupId>
            <artifactId>spring-boot-starter-web</artifactId>
        </dependency>
    </dependencies>
2
3
4
5
6
7
8
9
10
11
12
13
导入完毕:
3、编写主程序以及Control部分
主程序
@SpringBootApplication
public class HelloWorldMainApplication {

    public static void main(String[] args){
        // Spring应用启动
        SpringApplication.run(HelloWorldMainApplication.class, args);
    }
}
2
3
4
5
6
7
8
Control部分
@Controller
public class HelloController {

    @ResponseBody
    @RequestMapping("/hello")
    public String hello(){
        return "hello world";
    }
}
2
3
4
5
6
7
8
9
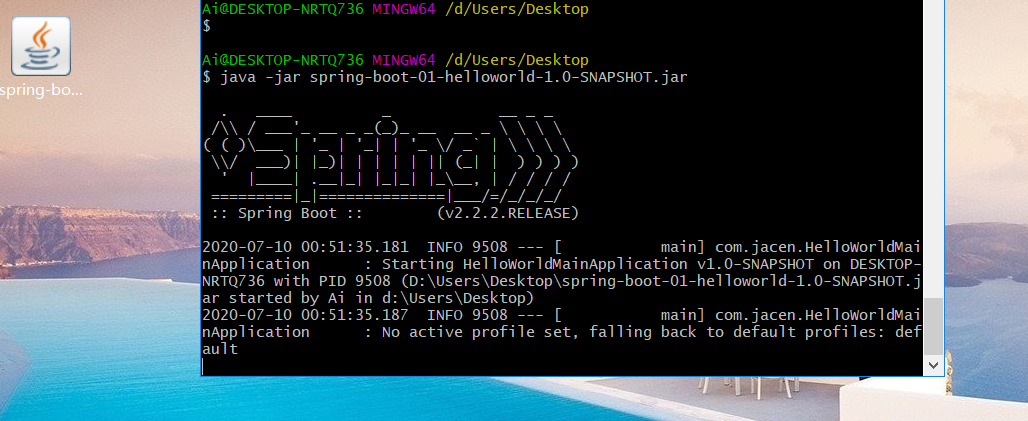
4、运行结果
控制台输出:
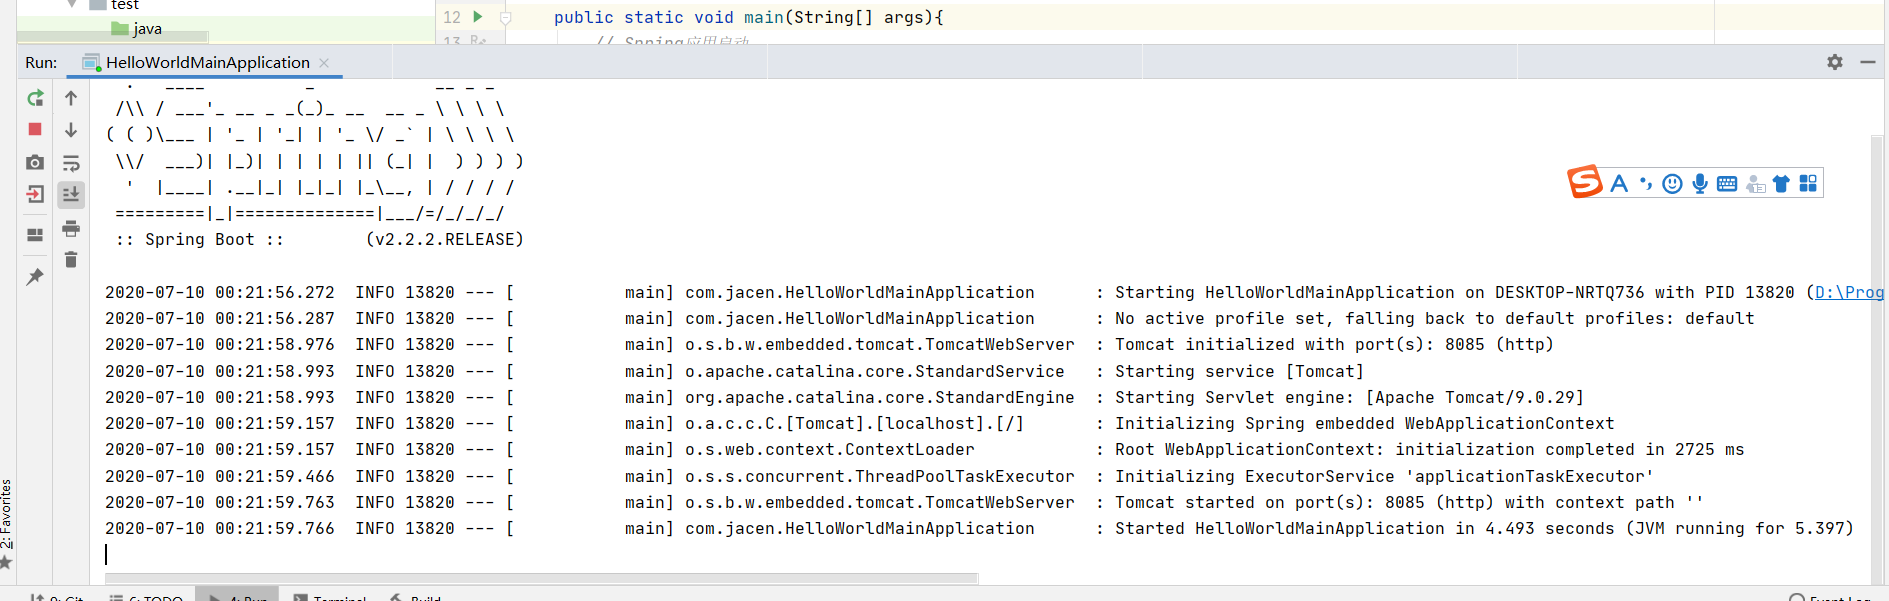
浏览器输入地址: http://localhost:8085/hello

5、简化部署
通过插件将应用打包成可执行的jar包
pom.xml中添加:
    <build>
        <plugins>
            <plugin>
                <groupId>org.springframework.boot</groupId>
                <artifactId>spring-boot-maven-plugin</artifactId>
            </plugin>
        </plugins>
    </build>
2
3
4
5
6
7
8
执行生命周期中的打包:
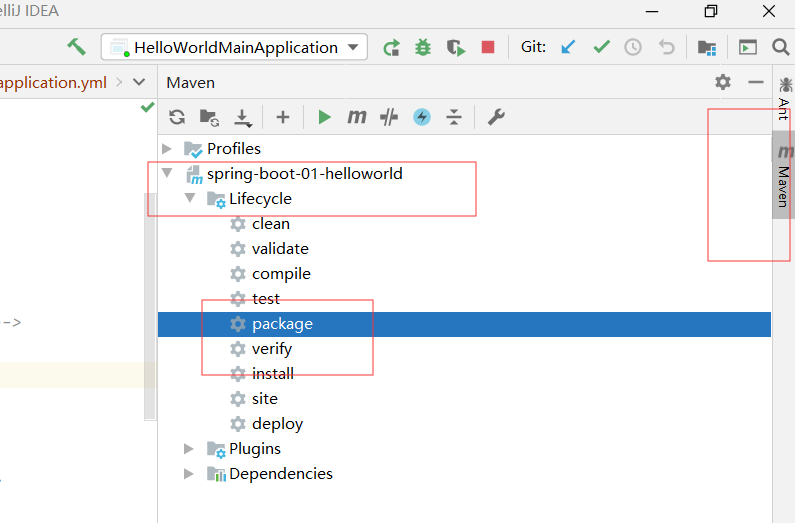
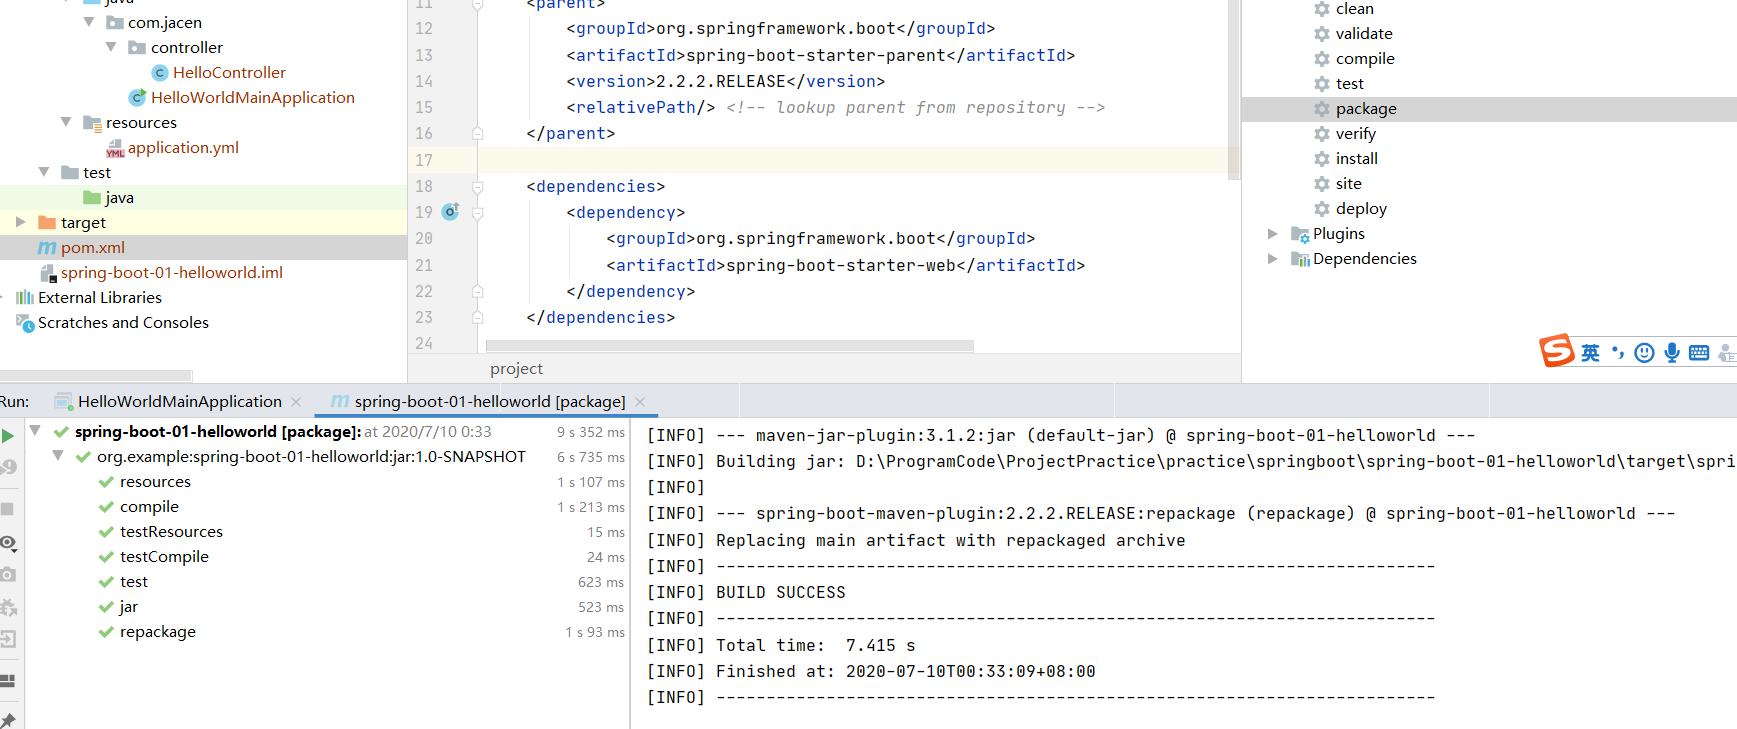
打包成jar包后,执行java -jar
# 2.2 HelloWorld探究
1、场景启动器starters
SpringBoot将所有功能场景抽取出来为一个个pom启动器,帮助导入正常运行所需要的依赖。
参考:https://docs.spring.io/spring-boot/docs/2.2.2.RELEASE/reference/html/
2、主程序类、主入口
@SpringBootApplication
public class HelloWorldMainApplication {

    public static void main(String[] args){
        // Spring应用启动
        SpringApplication.run(HelloWorldMainApplication.class, args);
    }
}
2
3
4
5
6
7
8
@SpringBootApplication 标注在某个类上面,说明这个类是SpringBoot的主配置类,Spring应该运行这个类的main方法来启动SpringBoot应用。
@Target({ElementType.TYPE})
@Retention(RetentionPolicy.RUNTIME)
@Documented
@Inherited
@SpringBootConfiguration
@EnableAutoConfiguration
@ComponentScan(
    excludeFilters = {@Filter(
    type = FilterType.CUSTOM,
    classes = {TypeExcludeFilter.class}
), @Filter(
    type = FilterType.CUSTOM,
    classes = {AutoConfigurationExcludeFilter.class}
)}
)
public @interface SpringBootApplication {
2
3
4
5
6
7
8
9
10
11
12
13
14
15
16
(1)第一个注解: @SpringBootConfiguration
@SpringBootConfiguration SpringBoot的配置类。标注在某个类上,表示这是一个SpringBoot的配置类。
@Configuration :标注在配置类。配置类也是容器中的一个组件。@Component
(2)第二个注解: @EnableAutoConfiguration
@EnableAutoConfiguration 用于开启自动配置功能。
@Import({AutoConfigurationPackages.Registrar.class}) Spring的底层注解@import,给容器导入一个组件。将主配置类(@SpringBootApplication标注)的类的所有包以及下面所有子包里面所有的组件扫描到Spring容器。
@Import({AutoConfigurationImportSelector.class}) 导入哪些组件的选择器;将需要导入的组件以全类名的方式返回;这些组件就会被添加到容器中;会给容器中导入非常多的自动配置类(xxxAutoConfiguration);给容器导入这个场景需要的所有组件,并配置好这些组件。
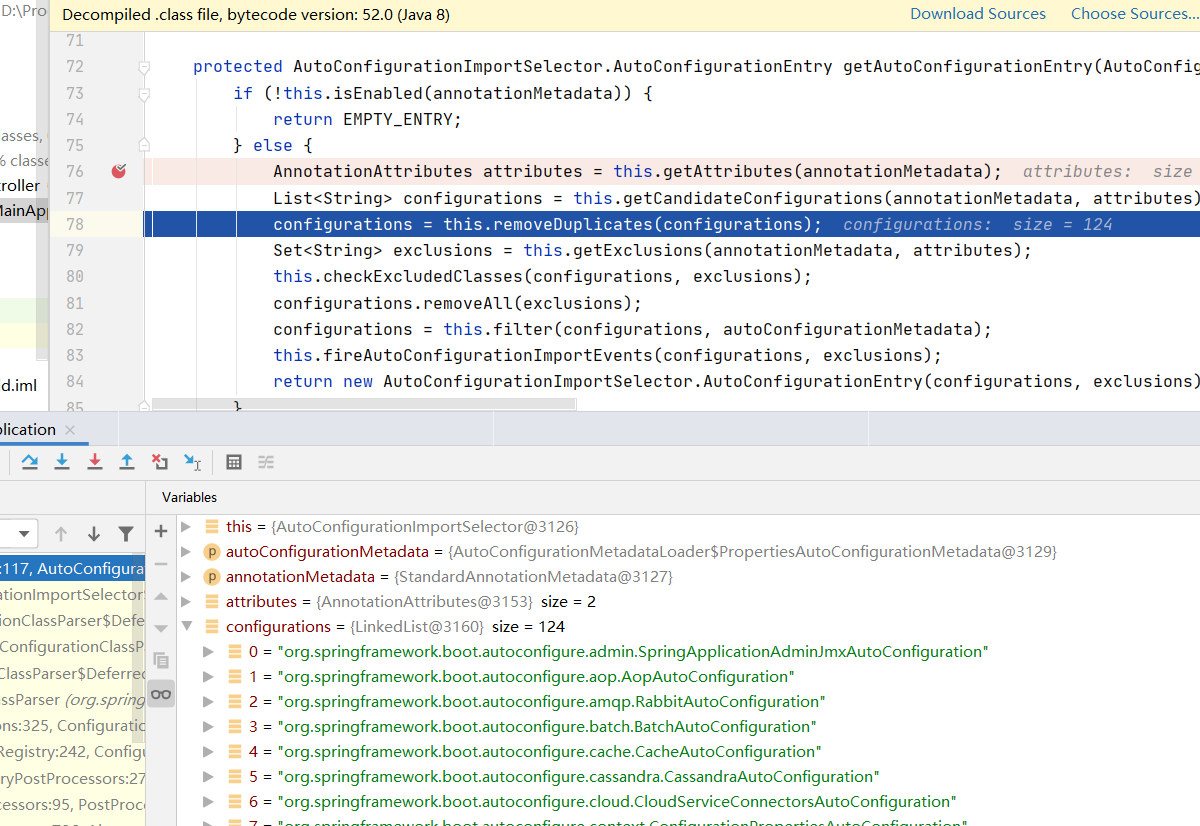
免去手动编写配置注入功能组件等工作。 SpringFactoriesLoader.loadFactoryNames(EnableAutoConfiguration.class,classLoader)
SpringBoot在启动的时候从类路径下META-INF/spring.factories中获取enableConfiguration指定的值,将这些值作为自动配置的类导入到容器中,自动配置类就生效,帮助我们进行配置工作。
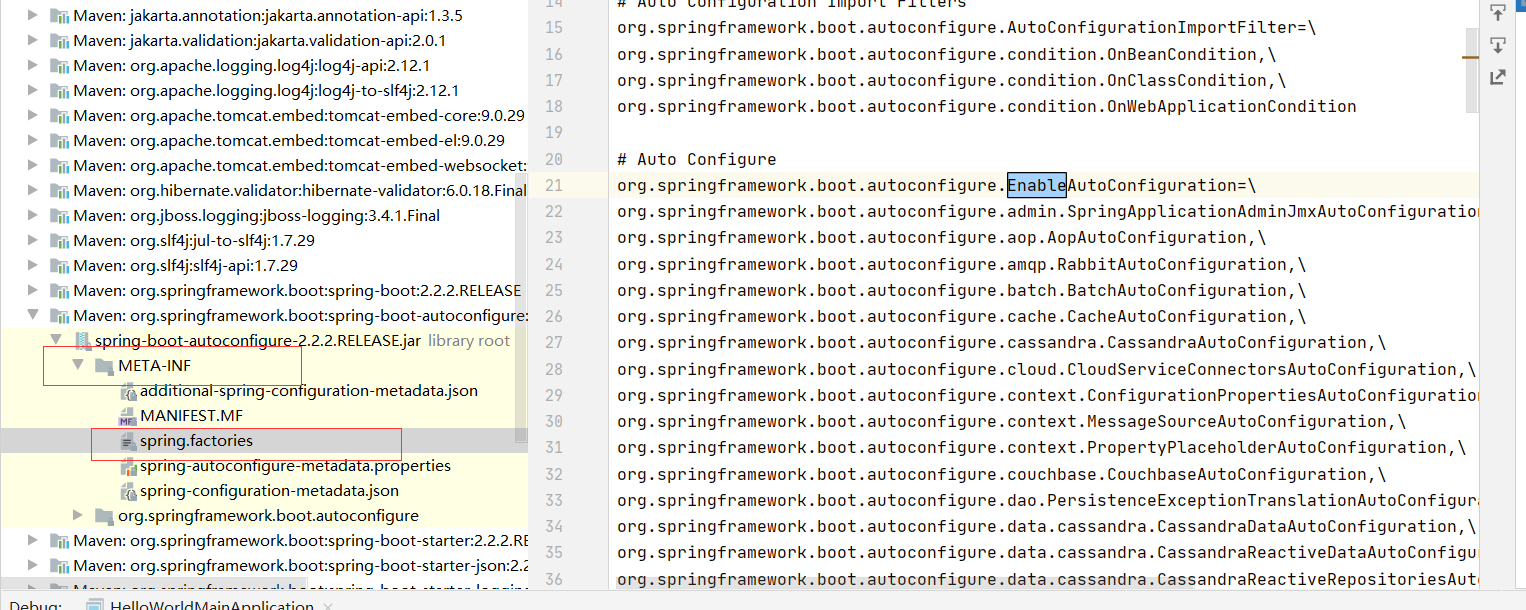
J2EE的整体解决方案和自动配置都在spring-boot-autoconfigure-2.2.2.RELEASE.jar
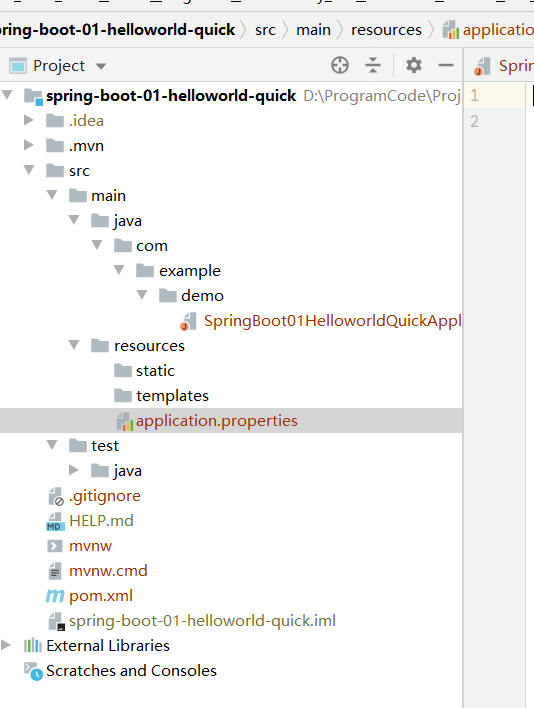
# 2.3 使用SpringInitilalizer创建SpringBoot项目
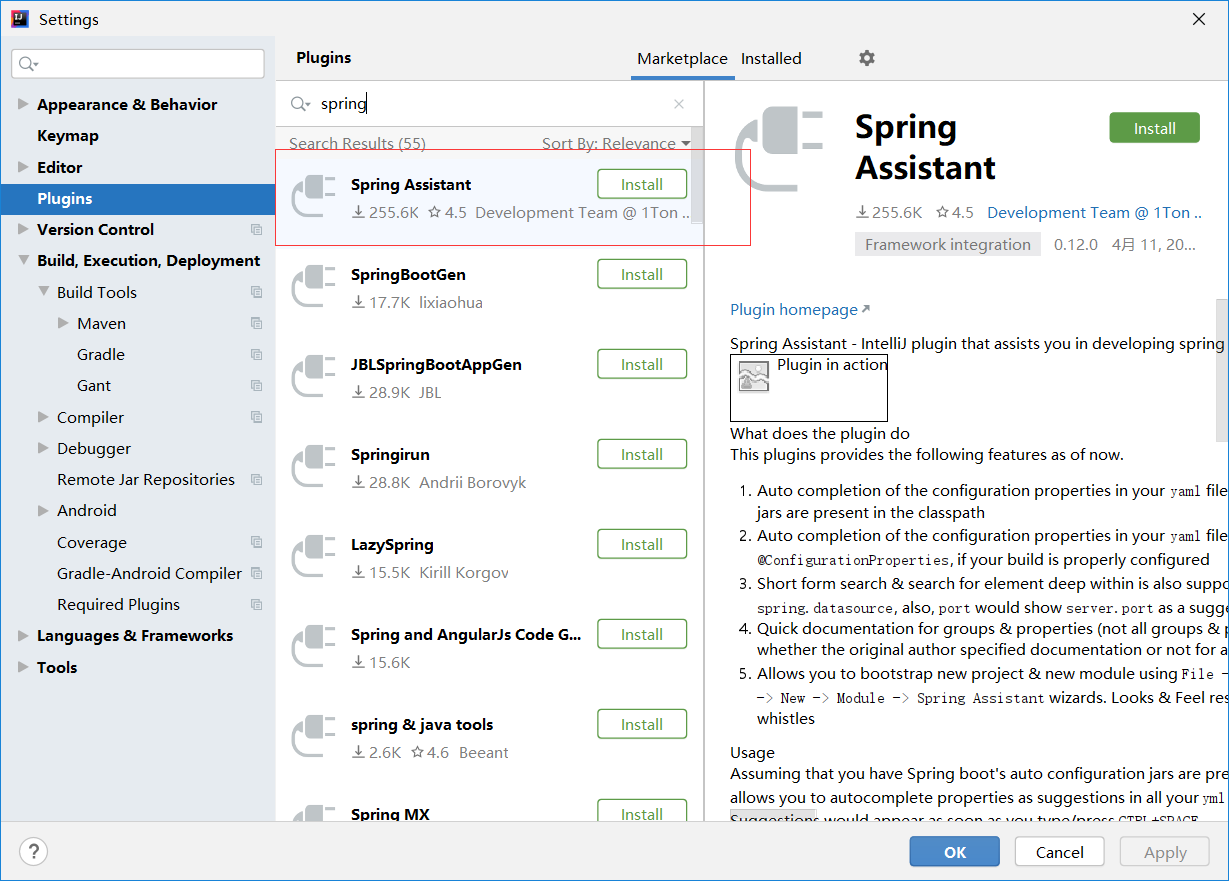
# step1 下载插件
Setting中在Plugins中安装Spring Assistant
# step2 使用Spring Assistant创建项目
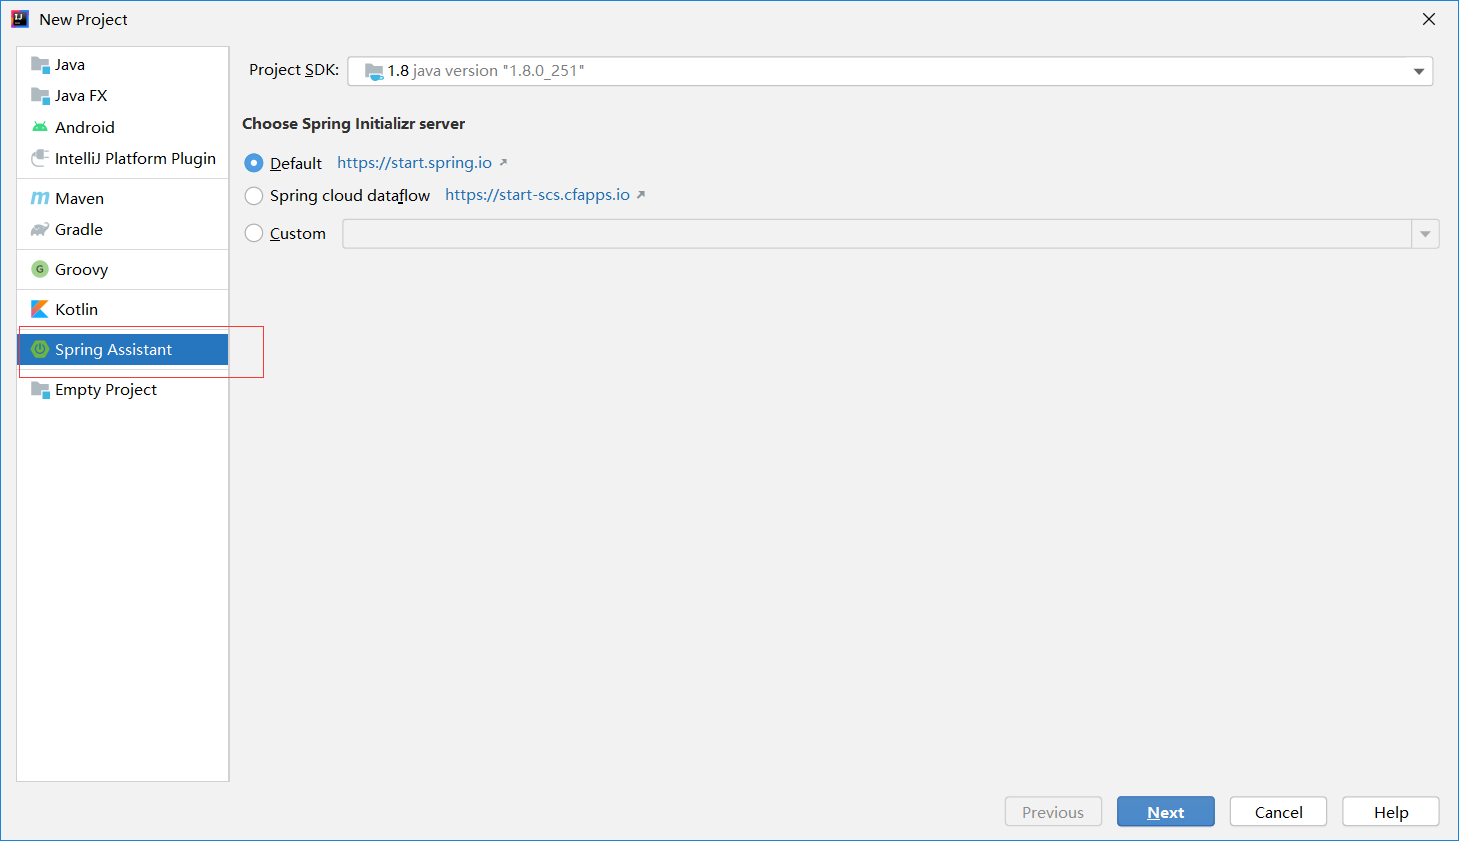
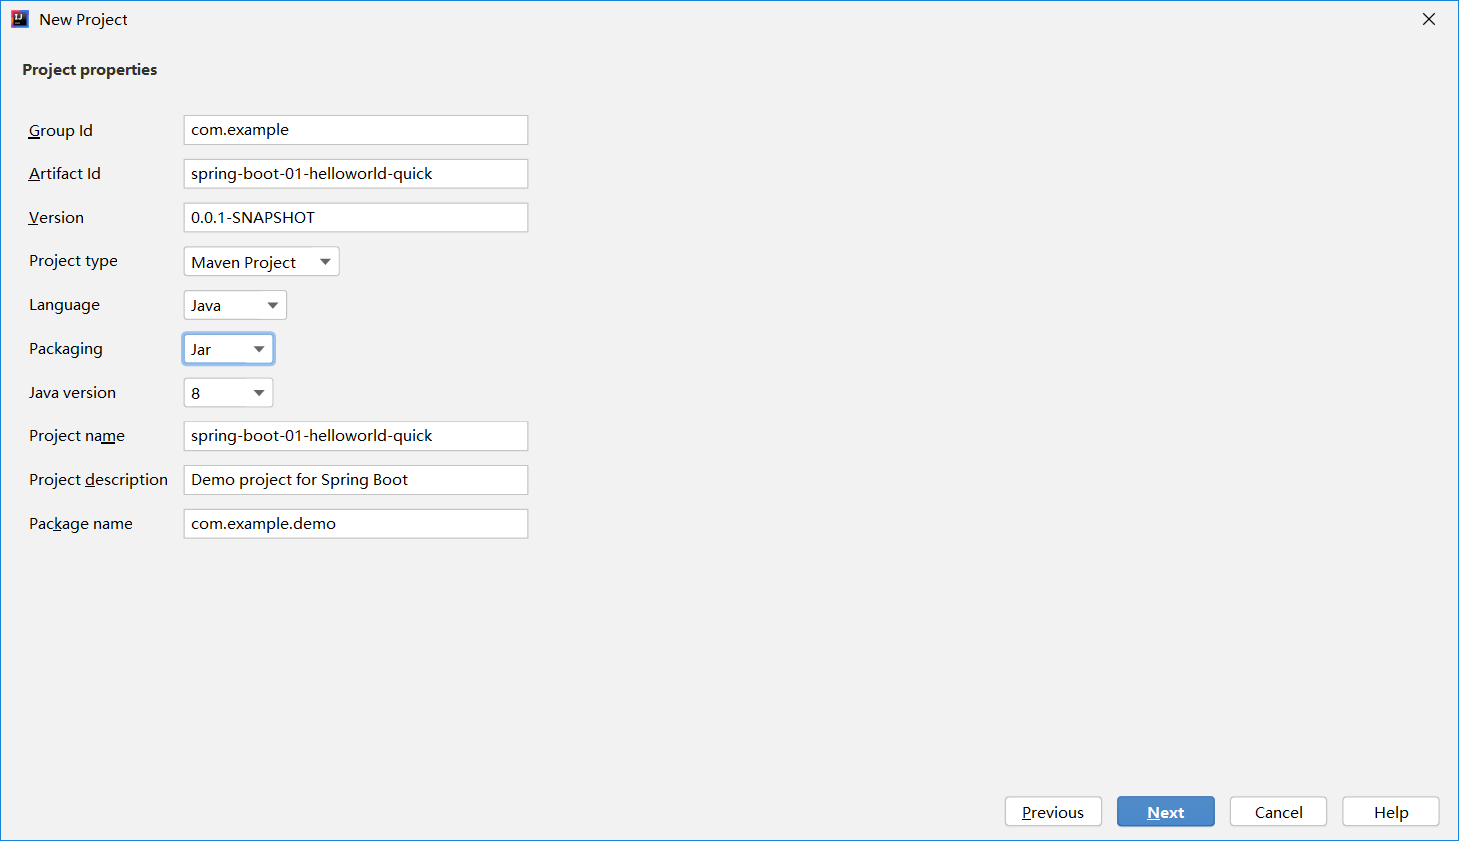
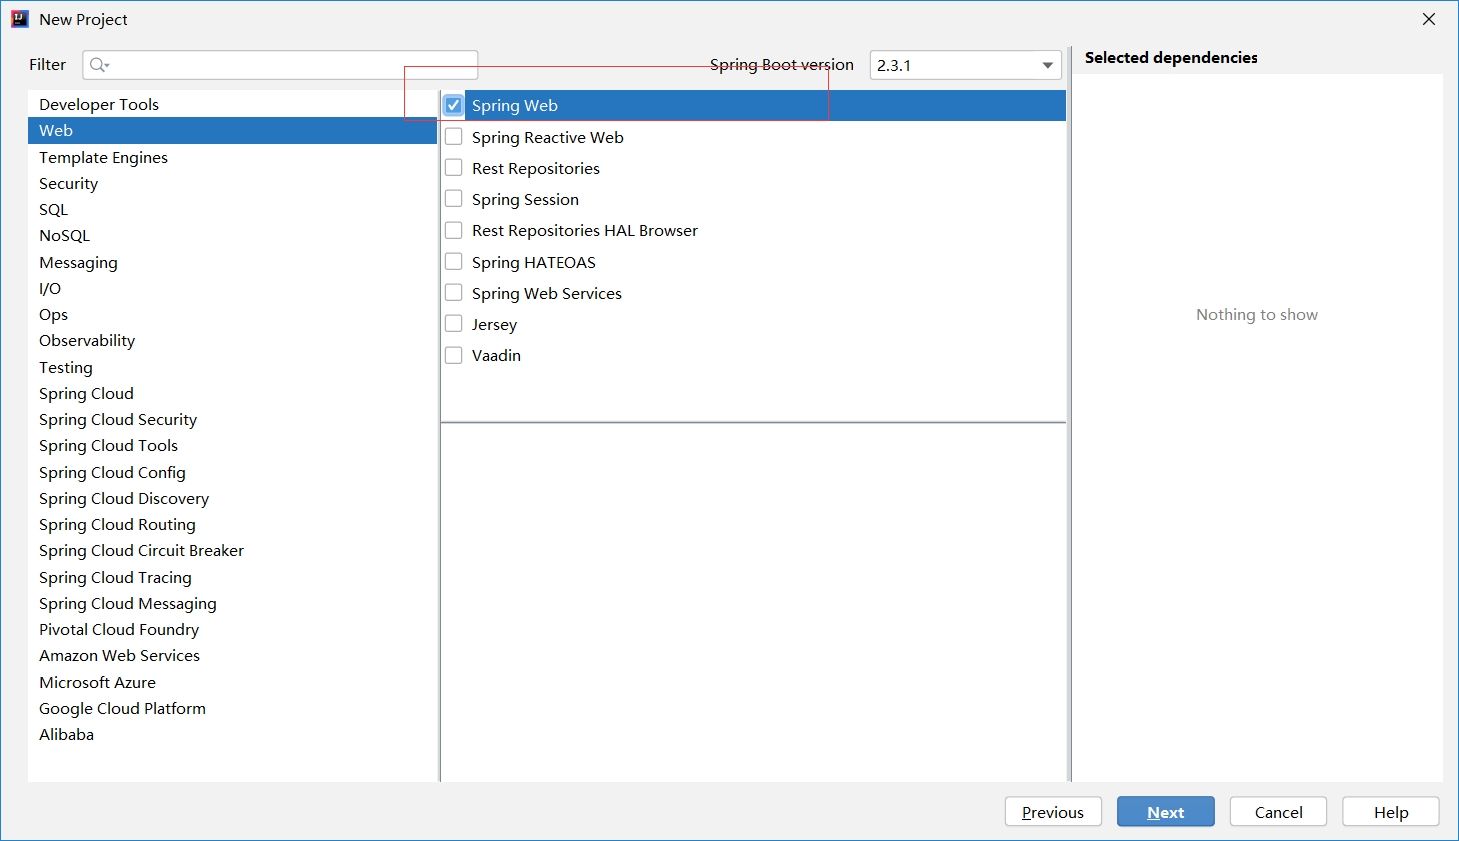
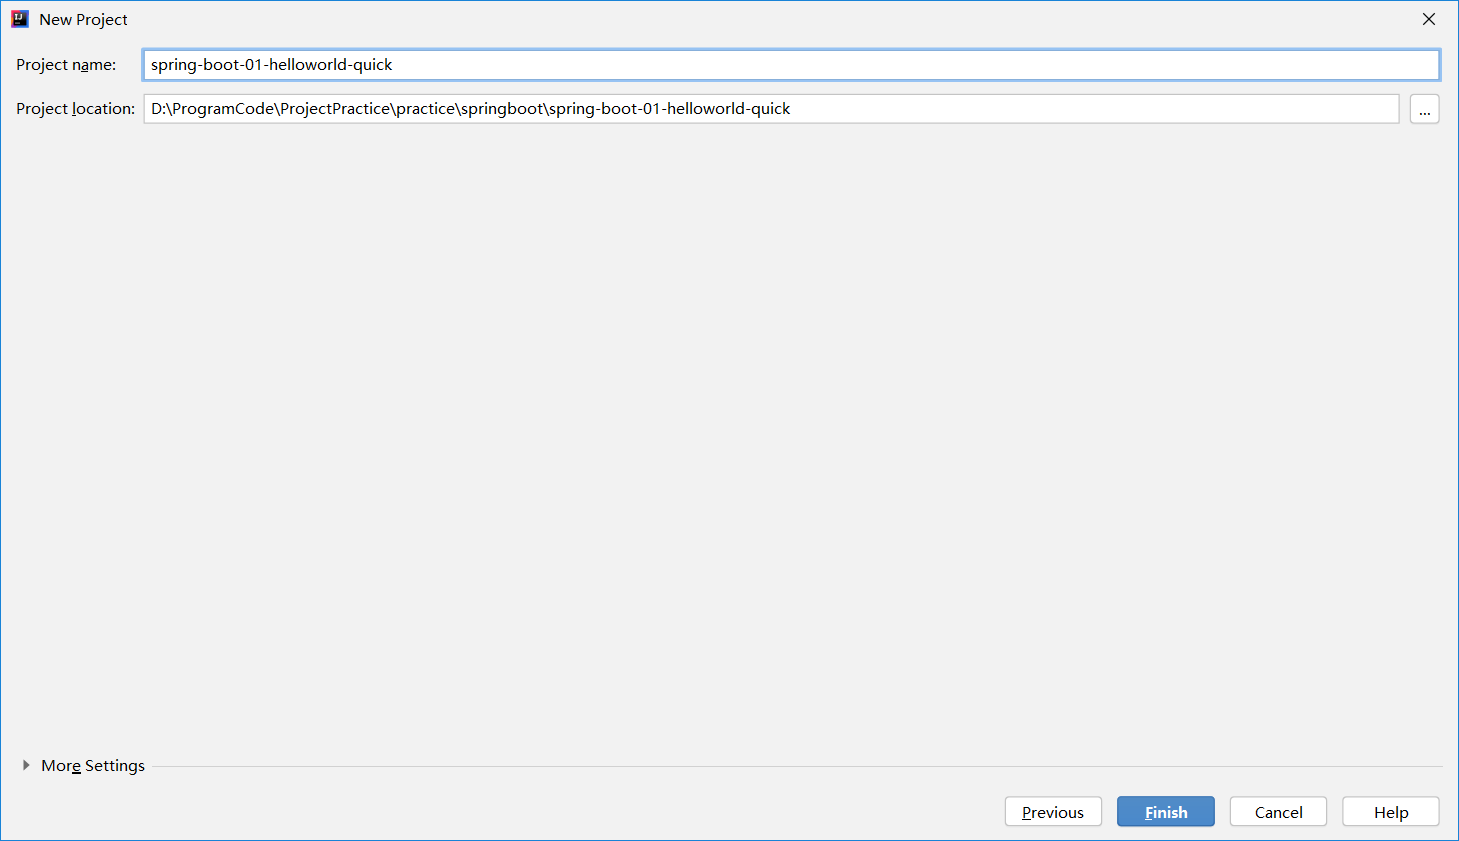
默认生成的SpringBoot项目包含:
- 主程序
- resoucrces文件夹
static静态资源;
temnplates模板页面;
applications.properties: SpringBoot应用的配置文件
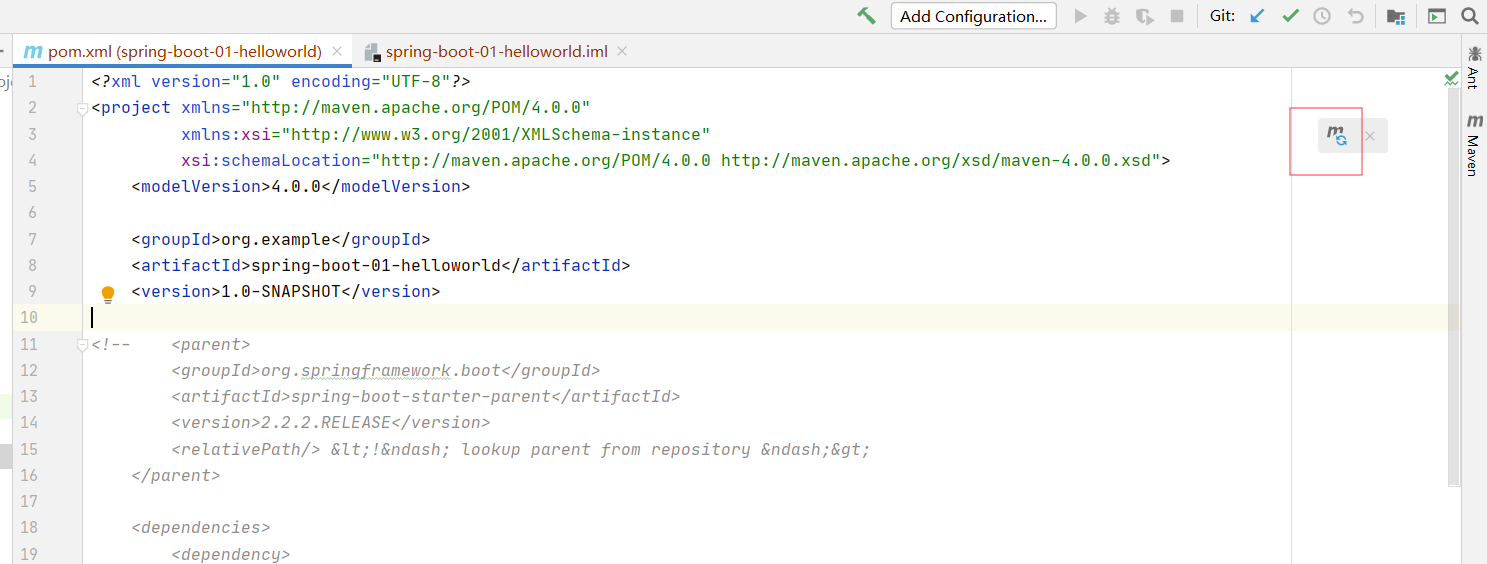
<?xml version="1.0" encoding="UTF-8"?>
<project xmlns="http://maven.apache.org/POM/4.0.0" xmlns:xsi="http://www.w3.org/2001/XMLSchema-instance"
   xsi:schemaLocation="http://maven.apache.org/POM/4.0.0 https://maven.apache.org/xsd/maven-4.0.0.xsd">
   <modelVersion>4.0.0</modelVersion>
   <parent>
   	<groupId>org.springframework.boot</groupId>
   	<artifactId>spring-boot-starter-parent</artifactId>
   	<version>2.3.1.RELEASE</version>
   	<relativePath/> <!-- lookup parent from repository -->
   </parent>
   <groupId>com.example</groupId>
   <artifactId>spring-boot-01-helloworld-quick</artifactId>
   <version>0.0.1-SNAPSHOT</version>
   <name>spring-boot-01-helloworld-quick</name>
   <description>Demo project for Spring Boot</description>

   <properties>
   	<java.version>1.8</java.version>
   </properties>

   <dependencies>
   	<dependency>
   		<groupId>org.springframework.boot</groupId>
   		<artifactId>spring-boot-starter-web</artifactId>
   	</dependency>

   	<dependency>
   		<groupId>org.springframework.boot</groupId>
   		<artifactId>spring-boot-starter-test</artifactId>
   		<scope>test</scope>
   		<exclusions>
   			<exclusion>
   				<groupId>org.junit.vintage</groupId>
   				<artifactId>junit-vintage-engine</artifactId>
   			</exclusion>
   		</exclusions>
   	</dependency>
   </dependencies>

   <build>
   	<plugins>
   		<plugin>
   			<groupId>org.springframework.boot</groupId>
   			<artifactId>spring-boot-maven-plugin</artifactId>
   		</plugin>
   	</plugins>
   </build>

</project>
2
3
4
5
6
7
8
9
10
11
12
13
14
15
16
17
18
19
20
21
22
23
24
25
26
27
28
29
30
31
32
33
34
35
36
37
38
39
40
41
42
43
44
45
46
47
48
49
50
# 2.4 配置
# 2.4.1 yaml简介
SpringBoot使用一个全局的配置文件,配置文件名是固定的。
- application.properties
- application.yml
配置文件的作用:修改SpringBoot自动配置的默认值;
yml 以数据为中心,比json、xml更适合做配置文件。
application.properties与application.yml对比:

# 2.4.2 yaml语法
(1)k:(空格)v:表示一对键值对(空格必须有);
server:
    port: 8081
2
以空格的缩进来控制层级关系。
缩进的空格数量不重要。只要是左对齐的一列数据,就是同一层级。
属性和值也是大小写敏感。
缩进时候不允许使用Tab键、只允许使用空格。
(2)YAML的三种数据结构
字面值:普通的值(数组、字符串、布尔)
对象、Map(属性和值)(键值对): k、v:在下一行来写对象的属性和值的关系;注意缩进。
friends:
    name: xiaoming
    age: 20
2
3
行内写法:
friends: {name: xiaoming, age: 20}
- 数组
用-表示数组
pets:
    - cat
    - dog
    - pig
2
3
4
行内写法:
pets: [cat, dog, pig]
SPringBoot使用snakeyaml(https://bitbucket.org/asomov/snakeyaml/wiki/Documentation#markdown-header-yaml-syntax)来解吸YAML
# 2.5 日志
抽象 sl4j
实际 logback
# 2.6 SpringBoot Web开发
# 2.6.1 使用SpringBoot
1) 创建SpringBoot应用时,选中我们需要的模块。
2) SpringBoot会将这些配置好,只需要在配置文件中指定少量配置就可以运行起来。
3) 编写业务代码
注:要自己知道Spring的自动配置原理,比如:如何修改,能否扩展?
# 2.6.2
webjars
# 2.6.2 Docker
# 定义:Docker是开源的应用容器引擎,基于Go语言。
# 核心概念
docker主机:安装了Docker程序的机器。
docker客户端:连接docker主机进行操作。
docker仓库:用于保存各种打包好的软件镜像。
docker镜像:软件打包好的镜像,放在docker仓库中。
docker容器:镜像启动后的实例称为一个容器。容器是独立运行的一个或者一组应用。
使用docker的步骤:
1)安装docker; 2)去docker仓库找到镜像; 3)使用docker运行这个镜像。
# 安装docker
问题记录:
Q1: 2020版本的自动导入Maven,需要点击右上角的按钮。
Q2: 添加阿里云镜像
当出现Cannot resolve plugin org.apache.maven.plugins:maven-clean-plugin:2.5,可在settings中添加如下语句:
	<mirror>
		<id>alimaven</id>
		<name>aliyun maven</name>
		<url>http://maven.aliyun.com/nexus/content/repositories/central/</url>
		<mirrorOf>central</mirrorOf>
	</mirror>
2
3
4
5
6
Q3:Spring Boot 报错:Web server failed to start. Port 8080 was already in use.
https://blog.csdn.net/zhouky1993/article/details/103974356
server:
  port: 8081
2
注:最后修改日期:2020/07/10
← 开发环境配置 C++ Primer →